A Guide To Transplanting Safely
Share
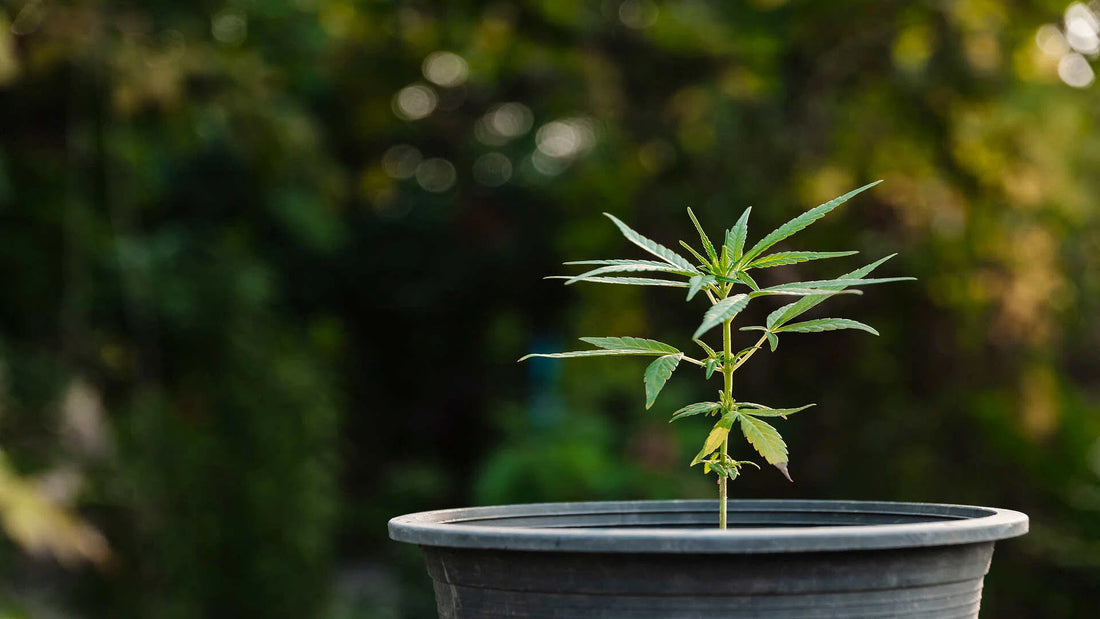
Transplanting is a crucial process in the life cycle of a plant. During this time, you move your plant from one container to another. When done correctly, it allows for continued growth and development, ensuring your plants reach their full potential. The size of their containers can limit plants. The more room your plant has for root growth, the larger it can become, which in turn results in a larger yield of flower. This guide will walk you through the essential transplanting steps, from understanding the right timing to using beneficial inoculants and reducing transplant shock.
When To Transplant Your Plant
Depending on whether you are starting from seeds or planting clones and whether they are photoperiod or autoflower will determine how often and what size containers you are using when transplanting.
Transplanting Seeds
Transplanting seeds is a breeze when starting them in biodegradable pots like soil blocks. Soil blocks are compacted coco coir and vermiculite that do not have a container. They can easily be started in a nursery tray and moved into containers after a week or two of germination.
Transplanting Clones
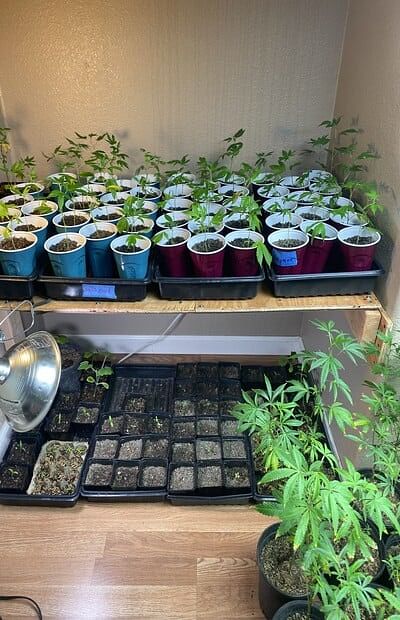
Once your clones have developed roots, it's time to transplant. This may mean planting directly into their forever home or into a vegetative container, ranging from a solo cup to a 3-gallon container, depending on resources and the length of time they will be kept in a vegetative space.
The critical thing to remember is that we want to avoid becoming root-bound during the vegetative phase.
By choosing a larger container, your roots will not begin spiralling, which is what we want to avoid. Once your plants' roots start spiralling, they start becoming root-bound. If you are growing autoflowers, becoming root-bound can end the vegetative phase, and for photoperiod plants, this can also slow their growth.
Avoid Becoming Root-Bound
Understanding when to transplant your plant is critical. One key sign that it's time to transplant is when your plant becomes root-bound. This occurs when the roots have grown so extensively that they circle the pot, creating a dense, tangled mass. Root-bound plants can suffer from stunted growth, nutrient deficiencies, and poor health.
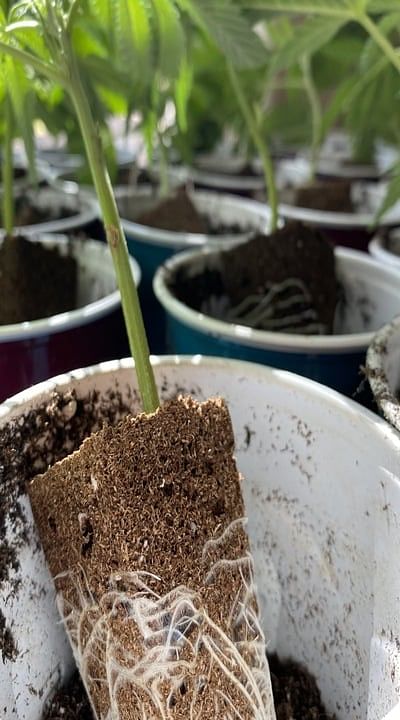
You can check your plant's roots by gently squeezing the sides of the container and pulling from the lower stem near the base of the soil. You should be able to pull the soil from the container, plants, roots, and all. You can also physically inspect your plant's roots at this time to determine if they are ready to be transplanted.
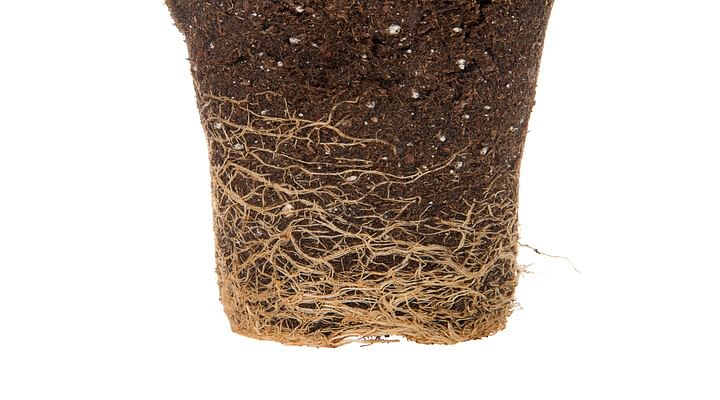
This is also a good time to inspect the health of your roots. Are they fuzzy and covered in the mycelium of mycorrhiza fungi? Are they bright white? Or do they look a little brown and limp? If your roots look anything but bright white and fuzzy, you may have a watering issue or pest problem, like root aphids.
Perfect Time For Transplanting
The ideal time to transplant is when your plant's roots have filled out the current container but have yet to start to circle. The roots are healthy and robust at this stage, making the transition smoother. The roots should be white, firm, and evenly spread throughout the soil. If they are dark, mushy, or have an unpleasant smell, it may indicate root rot or other issues.
Depending on your unique garden situation, you will determine how many times you transplant. For example, you may wait for plants to finish flowering before transplanting or wait for nicer weather before planting outdoors. Ideally, you transplant before becoming root-bound, but sometimes, it happens.
What To Do If Root Bound
If your plant is already root-bound, don't panic. Carefully tease apart the root ball, freeing the roots from their tight confines. This process, known as root pruning, encourages new root growth and helps the plant establish itself in the new container. Be gentle to avoid causing excessive damage to the roots. Imagine you are massaging your plant's roots to gently release them, allowing them to grow outward. If you do not do this, the roots will continue to grow in a spiral, which can negatively impact growth.
Steps For Transplanting
There are various steps to a successful transplant. In the following section, we will break them down to ensure optimal plant health throughout this process.
Preparing The Soil
Ensure that the soil in the new container is moist but not sopping wet. The soil in the plant's current pot should also be slightly moist to make the removal process easier and less stressful for the plant. It is a good idea to amend your soil with organic all-purpose fertilizer like Rainbow Mix prior to transplanting it.
Massaging The Roots
Before placing the plant in its new container, gently massage the root ball to encourage growth, especially if there are signs of being root-bound. This will help the roots spread out more efficiently in the new soil. You can do this by holding the plant by the root ball and gently loosening the roots from the container's shape until the visible roots hang.
Observing Root Health
Take this opportunity to inspect the roots closely. Healthy roots are usually white or light tan and smell fresh and earthy. They should be firm to the touch. Dark, slimy roots with a foul odour can indicate disease or rot, which needs to be addressed before transplanting. Look for any movement in the soil that could indicate pests such as root aphids.
Using Mycorrhizal Inoculant
Transplanting is the perfect time to inoculate your plant with mycorrhizal fungi. Be specific in the strain of fungi you choose. Over 90% of plant species have a symbiotic relationship with various strains of mycorrhizal fungi. There are endo and ecto mycorrhizal strains. Cannabis specifically associates with endo-mycorrhizal strains such as Glomus mossea and Glomus intraradices.
Incorporating mycorrhizal fungi during transplanting can significantly benefit your cannabis plants. These fungi form a symbiotic relationship with the plant roots, enhancing nutrient and water uptake. This relationship boosts the plant's resilience against stress and disease, promotes vigorous growth, and can improve yields.
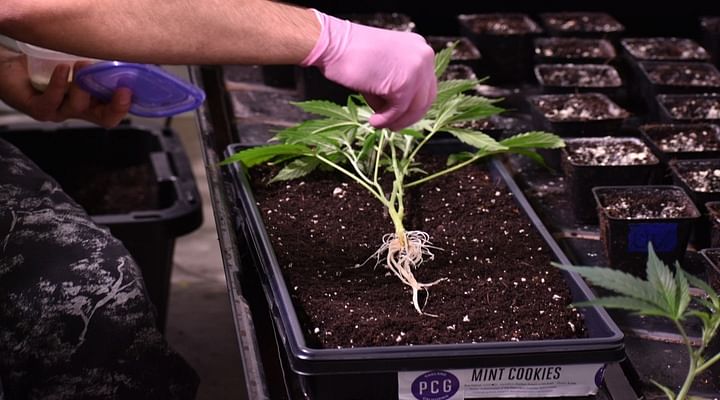
To use a mycorrhizal inoculant, sprinkle it directly on the roots or mix it into the planting hole before placing your plant. This ensures that the fungi come into direct contact with the roots, initiating the symbiotic relationship immediately.
Reducing Transplant Shock
To maintain optimal health, you should reduce the shock associated with transplanting. If you top your plants, waiting at least a week before or after transplanting is recommended to allow them to deal with one stress at a time. You can also do various things to increase your plants' stress tolerance.
Enhancing Superoxide Dismutase (SOD) Levels
Transplant shock can hinder a plant's growth and development. One effective way to mitigate this shock is by increasing the levels of superoxide dismutase (SOD) in your plants. SOD is an enzyme that helps protect plants from oxidative stress.
Using Yucca, Fulvic, And Kelp
- Yucca Extract: Yucca extract contains natural surfactants that improve water absorption and reduce plant stress. It helps the plant to manage water more effectively, particularly during and after transplanting.
- Fulvic Acid: Fulvic acid is a natural chelator that enhances nutrient uptake and improves soil structure. It helps the plant to absorb essential nutrients more efficiently, promoting faster recovery and growth.
- Kelp Extract: Kelp extract is rich in growth hormones, vitamins, and minerals that boost plant health. It enhances root development and reduces transplant shock, helping the plant to establish itself quickly in its new environment.
Recovery Time
After transplanting, give your plants three to seven days to recover before adding stress, such as topping or hardening off. This recovery period allows the roots to settle and the plant to adjust to its new environment, reducing the risk of transplant shock and promoting healthy growth.
Autoflower Specific Transplant Tips
Transplanting autoflowering cannabis plants differs significantly from transplanting photoperiod plants due to their distinct growth characteristics. Autoflowers have a fixed, short lifecycle that does not depend on light cycles to trigger flowering, making them more stress-sensitive. Because of this, it's crucial to minimize root disturbance.
Autoflowers should ideally be transplanted only once, from their starter pot to their final container, to avoid the stress of multiple transplants. When handling autoflowers, be incredibly gentle with the roots, as they are susceptible and do not tolerate being touched or disturbed. Excessive handling or root damage can trigger premature flowering, reducing yields and overall plant health. In contrast, photoperiod plants can often tolerate more transplanting and root manipulation, as they have a more prolonged vegetative stage to recover from any stress before entering the flowering phase.
Final Tips
Transplanting is a critical phase in your plant's life cycle, and careful attention to timing, root health, and post-transplant care can make all the difference. By following these guidelines, you can ensure that your plants survive the transplant process and thrive in their new environment. Remember to observe your plants regularly and provide the necessary care to support their continued growth and development. Happy gardening!

